Monday, June 20, 2016

Comfy Creatures Island Window Card with Eloise

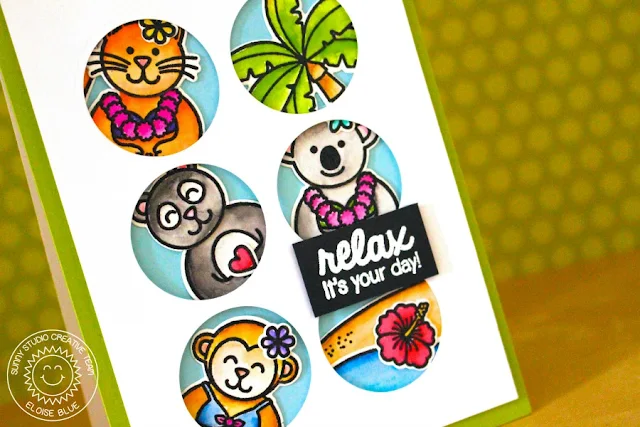
Hey everyone! Eloise here today and I’m here to create a super fun window type card for today’s project. I really enjoyed all the stamp sets from this release, but honestly my personal favourite set from this release was the Island Getaway set. I loved that palm tree image so so much! Plus all the other elements in the set to make scenes, which is my thing, just make the set so amazing. So for todays card I’m going to be using the Island Getaway set along with the Comfy Creatures, Summer Picnic and Sending my Love stamp sets to create my card today. I’m also going to be pulling in the Fresh and Fruity Dies to create my windows in my card today also.

Sunny Studio Stamps: Island Window Card by Eloise Blue (using Comfy Creatures Summer Picnic, Sending My Love & Island Getaway)

So to begin my card today I knew I wanted some images to peak out through some sort of windows. So I was digging through my stash to see if there was some simple shape die that I could use to make a repeating pattern to create some windows and I came across the die that cuts the orange slice in the Fresh and Fruity Die set and it was just a simple circle die – so I used this to create my windows today. I ruled up some guides just using a light hand and a pencil and make spots so the circle die could line up well and create the 6 circles I wanted. Once it was ruled up I ran my die through 6 times to create the pattern. 

I now needed to pick out my images I wanted to use. So I used the tree, island, waves border, hibiscus flower and the monkey in the bathing suit from Island Getaway, the panda / koala head, tail and bodies in bathers from the Comfy Creatures set and the cat head from Sending my Love. I coloured all my images in using my Zig Clean Colour Markers once again and then die cut them all using the coordinating dies.

Sunny Studio Stamps: Island Window Card by Eloise Blue (using Comfy Creatures Summer Picnic, Sending My Love & Island Getaway)


Now it was time to arrange my card together. I first placed a blue cardstock panel behind the window panel and drew around the circles to know where to put my images. I worked through one circle at a time positioning and cutting down the images to fit inside the circle so it doesn’t hang over into the above and below circles. I used all flat runner adhesive for this, as it was easier to keep it all flat.

To finish up my card, I first adhered a piece of green cardstock to my card base and then adhered the blue panel with all the images adhered to the green card base too. I then used some foam adhesive to adhere the window piece over the blue piece with the images and then I needed to figure out the sentiment. I pulled out my Summer Picnic stamp set and stamped ‘relax, it’s your day!’ in some Versamark ink on some black cardstock and heat embossed it in white. I lastly adhered the sentiment with some foam tape also to the window piece and that finished up my card.

I hope you enjoyed my window card today, I had a lot of fun making it and being able to use so many of those cute little animals that you can sort of dress up. 

- Eloise 

Sunny Studio Products Used:
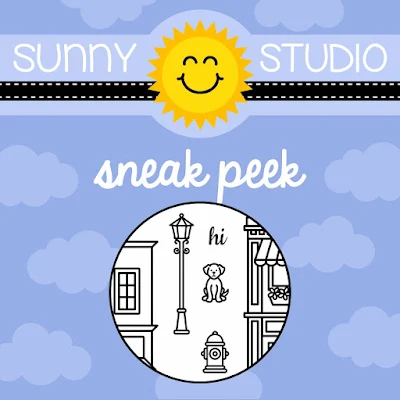
Before I go I have a quick sneak peek to share of one of four new stamp set being released on July 1st.
Sunny Studio Stamps: City Streets Stamp Set Sneak Peek

Make sure you stop by the blog this week to check out some more inspiration & sneak peeks!

Saturday, June 18, 2016

Sunny Saturday Share: Tropical & Fruity Summer Cards


Hi there!  How have you guys been?  I feel like it's been forever since we've had an open Saturday available to share some lovely customer creations!  There are so many beauties I've spotted over the past month on social media.  Here are a few that really caught my eye...

Tropical Paradise Cards by Nancy Damiano (@nancydamiano on instagram)

Sunny Studio Stamps: Tropical Paradise Summer Island Themed Cards by Nancy Damiano


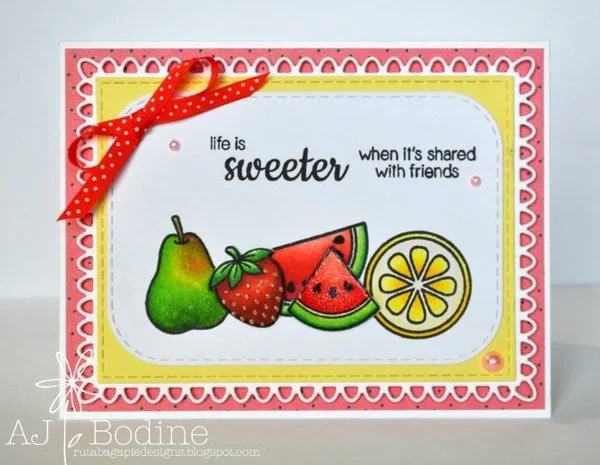
Sunny Studio Stamps: Fresh & Fruity Life Is Sweeter with Friends Card by AJ Bodine


Sunny Studio Stamps: Fresh & Fruity Strawberry Card by Juliana Michaels


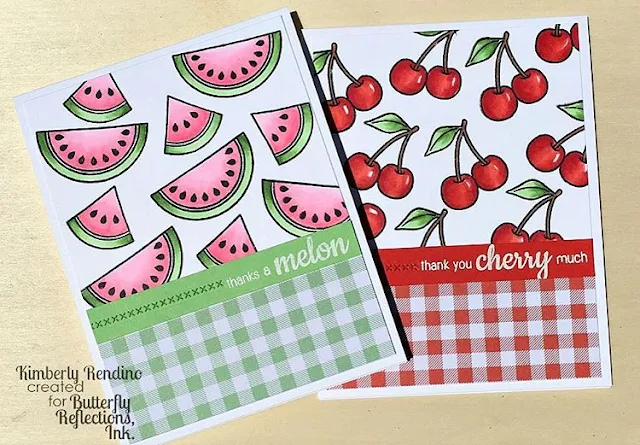
Sunny Studio Stamps: Fresh & Fruity Watermelon & Cherry Cards by Kimberly Rendino

Fresh & Fruity Card by Maggie (@rahzicrafts on instagram)

Sunny Studio Stamps: Fresh & Fruity Perfect Pear Anniversary Card by Maggie

Fresh & Fruity Card by Maggie (@rahzicrafts on instagram)

Sunny Studio Stamps:  Fresh & Fruity Fruit Birthday Card by Maggie

Tropical Paradise Card by Taunya Butler (@taunyabutler on instagram)

Sunny Studio Stamps: Tropical Paradise Flamingo Card by Taunya Butler


Stars & Stripes Card by Claire Broadwater (@clairecreatescards on instagram)


Sunny Studio Supplies:
I have been busy creating all sorts of cards using four brand new stamp sets that will be released on July 1st.  Make sure to tune in next week for some sneak peeks and again the last week of June for our special inspiration week with prizes each day leading up to the official release!  

I'm also conducting a survey on ink pads and would like to know when it comes to dye inks if you prefer felt or foam pads.  I hope you will give me your feedback using the poll in the top left corner.  I'm looking at adding a line of inks in the future.  Currently I'm leaning towards using a dense foam pad, but I want to make sure I'm not alone in my love for them.   Feel free to comment and leave me more of an explanation too.   ;)

In the meantime I hope you will continue to tag us with the hashtag #sunnystudiostamps and share your beautiful projects with us on Instagramour facebook page or in our flickr group!  

I hope you guys have a wonderful weekend!  :)

Friday, June 17, 2016

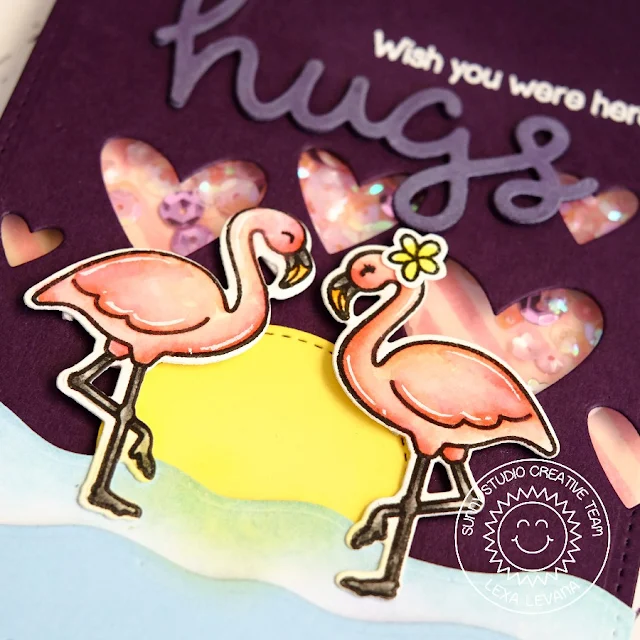
Tropical Paradise Wish You Were Here Flamingo Card with Lexa

Happy Fri-YAY everyone!

Lexa here with a color block shaker card for today. Let's take a look for more details about it right now..

Sunny Studio Stamps: Tropical Paradise Wish You Were Here Flamingo Card by Lexa Levana.

I started my card with a 4.25" x 5.5" eggplant cardstock and arranged various sized heart dies to make a window for my shaker card. It gives a little twist instead of a regular shape for the window. Those flamingos from Tropical Paradise are in looove. I made diagonal stripes on the background with a stencil and pink pigment ink and added a mix of pink sequins to match the flamingos and the hearts..sweet! I also cut two stripes of blue cardstock with the Wavy Border Dies as the water for they stand. The yellow flower and 'wish you were here' sentiment are from Island Getaway.

Sunny Studio Stamps: Tropical Paradise Wish You Were Here Flamingo Card by Lexa Levana.

I don't usually use colored backgrounds for my cards, but usually prefer a white and clean background most of the time. But... now that I've made one, I kinda like how it turned out. What do you think? Please let me know in the comment section below.

Thank you for stopping by. Have a great day!

Thursday, June 16, 2016

Tropical Paradise Watercolored Flamingo Card with Vanessa

Hi everyone! Vanessa here with a flamingo card using Tropical Paradise

I've seen many pretty patterns with flamingos everywhere and wanted to create my own on a card with a messy watercolor look.

Sunny Studio Stamps: Tropical Paradise Watercolored Flamingo Birthday Card by Vanessa Menhorn.

I stamped the flamingos repeatedly onto a panel of watercolor paper and messily colored them with Peerless Watercolors. Now I added spritzes of ink and adhered the panel to my pink card base. I stamped and heat embossed the sentiment onto a strip of black cardstock, trimmed it and adhered it with foam tape. Then I die-cut stars from pink and gold glitter cardstock and adhered them, together with gold sequins.

Sunny Studio Stamps: Tropical Paradise Watercolored Flamingo Birthday Card by Vanessa Menhorn.

This technique can be used for many images, the possibilities are endless! I hope you liked today's card! 

Thanks for stopping by :)

Vanessa

Wednesday, June 15, 2016

Tropical Paradise & Island Getaway Aloha card by Lindsey

Hi, Lindsey here today with a card featuring Island Getaway and Tropical Paradise. This card has me wishing I was headed to Hawaii! There are so many cute images in both of these stamp sets, and they work really well together also!  Let's get started!

Sunny Studio Stamps: Tropical Paradise & Island Getaway Aloha card by Lindsey Sams.

To begin, I cut a piece of black and white patterned paper to an A2 size. I then cut a solid piece of pink cardstock to 5 1/2" x 3 3/4". This left a quarter of an inch of the striped paper showing on either side of the pink cardstock. Finally, I cut a piece of white cardstock to 5 1/2" x 3 1/2". I did my stamping on the white panel. I simply picked out some tropical images from each set that I thought looked cute together. I then arranged them on my white cardstock and stamped them down. I colored the images using Copic markers. I tried to use lighter shades for this card to keep it nice and airy. I outlined all the images using a light blue Copic marker and added some Wink of Stella for a little shine! 

Sunny Studio Stamps: Tropical Paradise & Island Getaway Aloha card by Lindsey Sams.

That's it! This card was fun to make because I got to use so many cute images from both sets. Keep checking back to the blog for more inspiration. I hope I've inspired you to try your own collage card. I can't wait to see what you create! Have a great day!

Tuesday, June 14, 2016

Tropical Paradise - Cheers to you by Anni

Hey stampers, Anni here!   Today's card features the great summer set Tropical Paradise and the matching die set! I love this set because of all the yummy cocktails in it.

Sunny Studio Stamps: Tropical Paradise Fruity Umbrella Drink Cheers Card by Anni Lerche.

I started with some ink blending through a swirl stencils which reminds me of waves in the ocean. I used a very soft turquoise ink and a very light hand.  I stamped the images with Versafine and embossed them with clear embossing powder. Once again I used watercolors to color the images, it seems I get used to them. To ground the images I stamped the sentiment on a stripe of paper and positioned the glasses on it. 

Sunny Studio Stamps: Tropical Paradise Fruity Umbrella Drink Cheers Card by Anni Lerche.

Thanks for stopping by and have a sunny week!

Anni

Monday, June 13, 2016

Tropical Paradise and Island Getaway Flamingo Card with Eloise

Hello everyone, Eloise here and today I’m back with another card to feature off the new Tropical Paradise and Island Getaway stamp sets. Today I’ve created a fun island scene card with the Flamingos.

Sunny Studio Stamps: Tropical Paradise & Island Getaway Flamingo Card by Eloise Blue.

To begin my card today I stamped out all the images I wanted to use from both the Tropical Paradise and the Island Getaway stamp sets. I decided I wanted to watercolour these images with my Zig Clean Colour Markers so I stamped them out on some watercolour cardstock along with Versafne Onyx Black ink so I could clear emboss the images. I then used various colours of the markers to colour in my images. Once they were dry I used the coordinating dies to cut them out.

I now moved onto the background piece. For the background – I used various blue colours from the Peerless watercolours pack and just created a random watercolour background. I then used a simple circle die and die-cut a circle and used some yellows and oranges to colour it to look like a sunset. I then dried them with a heat tool.

Before finishing up the card I wanted to figure out what I wanted to do for the sentiment. I decided that I wanted it in a speech bubble, but I didn’t have a stamp so I decided to make my own. I traced around something circular and add a little triangle on the edge to create my own speech bubble, I did this with a black pen and then traced over it with a Versamarker pen to make it sticky so I could heat emboss it to make it the same as the rest of the images. Once it was done I stamped the sentiment ‘you’re sun sational’ from the Island Getaway stamp set inside it – I love how this turned out. I then trimmed around the speech bubble to make it match the die cut images.

Sunny Studio Stamps: Tropical Paradise & Island Getaway Flamingo Card by Eloise Blue.Now it was time to put my card together. I first started with a white card base and then I grabbed a piece of green cardstock and adhered that flat onto the card base. I then took some fun foam sheets and adhere it onto the back of the watercoloured background and then the background onto the cardbase. I then took some tape adhesive to adhere the circle onto the watercolour background also. I started arranging my images on top of the background, but it didn’t look right, so I took a piece of vellum and tried that over top and I liked the look of that better.

So I knew where to put adhesive to be able to adhere my vellum, I adhered my scene together first on top of the vellum and then adhered the vellum – just putting adhesive behind my images and sticking it onto the background panel now and that finished up the card for today.

I hope you enjoyed my card and got inspired – I love the subtle look of the background that the vellum made, it makes the images shine so much more but it still looks like a complete scene. Check back on the blog this week to check out the other ladies wonderful projects!

- Eloise 

Sunny Studio Products Used: